A dog bee sting is one of the most common, and frightening, outdoor emergencies a U.S. pet owner can face. In one second, your dog is happily exploring the yard; in the next, they are yelping in pain, confused and distressed. That moment of panic is real. What do you do? Is it a minor irritation, or is it a life-threatening emergency? Knowing the difference—and acting quickly—can save your dog’s life.
This guide is designed to be your step-by-step handbook. We will walk you through immediate first aid, how to spot the critical signs of an allergic reaction, and how to safely treat a mild dog bee sting at home. For pet owners across the United States, from the suburbs of New Jersey to the backyards of California, encounters with stinging insects are a fact of life. Your preparedness is your dog’s best protection.
Immediate First Aid: The First 60 Seconds of a Dog Bee Sting
What you do in the very first minute can significantly impact the outcome of a dog bee sting. Your dog will be looking to you for cues, so your calm and decisive action is paramount.
Step 1: Stay Calm and Move to Safety
Your dog is in pain and confused. If you panic, their anxiety and heart rate will increase, which can speed the spread of venom. Speak in a calm, soothing voice and immediately move your dog indoors or to a safe, enclosed area. If you were near a hive or nest, you need to get away quickly to prevent a swarm attack, which is a far more dangerous situation than a single dog bee sting.
Step 2: Locate and Remove the Stinger (This is CRITICAL)
This is the single most important action you can take. Honeybees leave their barbed stinger behind, and it continues to pump venom into your dog’s skin for several minutes. Wasps, hornets, and yellow jackets do not typically leave a stinger, meaning they can sting multiple times.
- DO NOT SQUEEZE: Never use tweezers or your fingers to pinch and pull the stinger. The stinger is attached to a venom sac. Squeezing it is like squeezing a syringe, injecting the entire dose of venom at once.
- DO SCRAPE: Get a credit card, your driver’s license, or even your fingernail. Press it flat against your dog’s skin and scrape it across the stinger. This motion dislodges the stinger sideways without squeezing the sac.
If you can’t see a stinger, it was likely a wasp, or the stinger has already fallen out. Do not frantically dig in your dog’s skin, which only causes more pain. Removing the stinger is the priority for a honeybee dog bee sting to limit the venom.
Step 3: Identify the Sting Location
Quickly check where your dog was stung. Common areas include:
- Paws (from stepping on a bee in the grass)
- Muzzle, nose, or face (from being too curious)
- Belly or legs
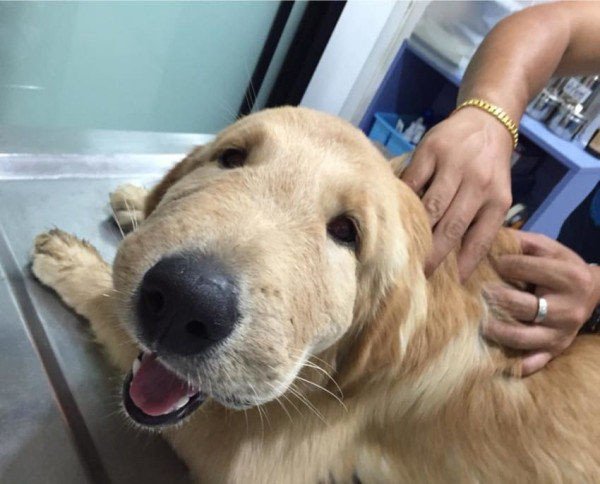
Knowing the location is vital, as a dog bee sting inside the mouth or on the neck/throat is an immediate emergency, regardless of allergy, due to the risk of swelling that can block their airway.
Assessing Severity: Normal Reaction vs. Life-Threatening Anaphylaxis
Once you’ve removed the stinger, your job for the next 10-30 minutes is observation. You must determine if your dog is having a local reaction (normal) or a systemic/anaphylactic reaction (deadly).

Signs of a Mild, Local Reaction (Normal)
A normal dog bee sting reaction is confined to the area of the sting. Symptoms include:
- Whining or yelping at the time of the sting.
- Limping or holding up the affected paw.
- Licking, chewing, or pawing at the sting site.
- Minor swelling and redness localized to the sting area.
- The dog is otherwise alert, breathing normally, and responsive.
These signs are expected. The pain from the dog bee sting is sharp, but it should begin to subside.
Signs of a Severe, Anaphylactic Reaction (Emergency)
Anaphylactic shock is a severe, whole-body allergic reaction to the venom of a dog bee sting. These signs can develop within minutes and are a go-to-the-vet-NOW emergency.
- Severe, Rapid Swelling: Especially of the face, muzzle, snout, or neck. Your dog’s face may look puffy or “bumpy” (hives).
- Difficulty Breathing: This is the most dangerous sign. Listen for wheezing, coughing, or any sign of labored breathing. This is caused by swelling in the throat and airways.
- Vomiting or Severe Diarrhea: The body’s systemic response to the allergy.
- Pale Gums: Check your dog’s gums. If they are pale, white, or bluish instead of a healthy pink, it’s a sign of shock.
- Weakness or Collapse: The dog may seem dizzy, disoriented, or unable to stand.
If you see any of these signs, do not wait. Stop all at-home treatment, get in the car, and go to the nearest emergency veterinary hospital immediately. Call them on the way to let them know you are inbound with a suspected anaphylactic reaction from a dog bee sting. This is a true life-or-death situation where minutes count.
This severe reaction is exactly why owners of dogs with known allergies often carry a dog-specific epinephrine auto-injector prescribed by their vet.
How to Treat a Mild Dog Bee Sting at Home
If, and only if, your dog is showing only mild, local signs and you are 100% confident it is not an allergic reaction, you can proceed with at-home care to make them more comfortable.
Step 1: Apply a Cold Compress
Wrap an ice pack, or a bag of frozen vegetables, in a thin towel. Apply it to the dog bee sting site for 10-minute intervals. The cold is incredibly effective at:
- Reducing swelling and inflammation.
- Numbing the area to relieve pain.
- Slowing the local spread of any remaining venom.
Step 2: Soothe the Itch with a Paste
You can make a simple, soothing paste to apply to the dog bee sting site. Bee venom is acidic, so a mild alkaline can help neutralize it.
- Baking Soda Paste: Mix a small amount of baking soda with just enough water to form a thick paste. Apply it gently to the sting site.
(Note: Wasp venom is alkaline, so a mild acid like vinegar is often recommended. Since you may not know, a simple cold compress is always the safest bet).
Step 3: Ask Your Vet About Antihistamines (Benadryl)
CRITICAL: NEVER give your dog any human medication without first consulting your veterinarian.
Many U.S. veterinarians will recommend giving plain Diphenhydramine (the active ingredient in Benadryl) for a mild dog bee sting to help with swelling and itching. However, you must call your vet to confirm two things:
- If it’s safe for your dog: Dogs with certain health conditions (like glaucoma or high blood pressure) should not take it.
- The Correct Dosage: The dosage is based on your dog’s weight (a common dose is 1mg per pound, but this must be confirmed by your vet).
- The Correct Formula: You MUST use plain Diphenhydramine. Many “Benadryl” or “Zyrtec” products in the U.S. are combination cold/sinus formulas that contain pseudoephedrine or xylitol, which are extremely toxic and potentially lethal to dogs.
Step 4: Prevent Licking and Monitor
The dog bee sting site will become itchy as it heals. Your dog’s first instinct is to lick it, but their saliva and tongue can introduce bacteria and cause a secondary infection. You may need to use an E-collar (the “cone of shame”) for a day or two to let the area heal properly.
Continue to monitor your dog for 24 hours. While most severe reactions are fast, delayed reactions can happen.
High-Risk Scenarios That Always Require a Vet
Even if your dog isn’t allergic, some dog bee sting situations are an automatic emergency.
- Multiple Stings: A single dog bee sting is a venom problem; 20 stings is a toxin problem. A large number of stings, even in a non-allergic dog, can overwhelm the body. The cumulative venom dose can cause severe systemic reactions, including organ damage (like kidney failure) or muscle breakdown. This is a life-threatening emergency.
- Stings Inside the Mouth, Nose, or Throat: As mentioned, a dog bee sting in these locations is extremely dangerous. You cannot see the swelling, and it can rapidly close your dog’s airway, leading to suffocation. Go to the vet immediately.
- Known Allergic Dogs: If your dog has ever had a serious reaction to a dog bee sting in the past, the next reaction is often faster and more severe. Do not “wait and see.” Go to the vet as a precaution. Your vet should be consulted about prescribing an EpiPen for your dog.
Prevention: Protecting Your Curious Pup
The best defense is a good offense. While you can’t prevent every dog bee sting, you can reduce the risk.
- Teach “Leave It”: A strong “leave it” or “drop it” command is one of the most important basic dog training commands. This can stop your dog from snapping at or trying to eat a buzzing insect.
- Yard Maintenance: Bees love clover and flowering weeds. Keep your lawn mowed. Walk your property and look for in-ground yellow jacket nests or hives in trees, and have them professionally removed.
- Supervise Exploration: Be extra vigilant when your dog is sniffing around flower beds, fruit trees, or under decks, as these are common nesting areas.
- Cover Food: When eating outdoors, keep human food and sugary drinks covered. These are a major attractant for wasps and yellow jackets, increasing the risk of a sting.
For more information on other potential risks lurking in your home and yard, be sure to read our guide on common household dangers for pets.
Final Checklist for a Dog Bee Sting
A dog bee sting is a scary event, but you are now prepared.
- Step 1: Move to safety.
- Step 2: Scrape (don’t squeeze!) the stinger out.
- Step 3: Assess: Look for severe swelling, hives, or difficulty breathing.
- Step 4: If you see any signs of allergy, go to the emergency vet immediately.
- Step 5: If the reaction is mild and local, use a cold compress and call your vet to ask about antihistamines.
Keep your vet’s and the local emergency animal hospital’s numbers saved in your phone. Your calm head and quick action are the best tools you have to handle a dog bee sting and ensure your canine companion is safe.